.png?fit=max&auto=format&n=jKjpuy2fz57OUcfn&q=85&s=d5b9cacebbb4a94e2c6bac33ad479982)
.png?fit=max&auto=format&n=jKjpuy2fz57OUcfn&q=85&s=0e6d93d474315b69b3046316150e4582)
Prerequisites
Before you start, make sure you have:- A DeepVista account with an active project
- Claude Code Connectors set up
Step-by-step guide
1
Open your machine's terminal from DeepVista
Go to Settings → Machines, then under Connect your machine, click Open Terminal.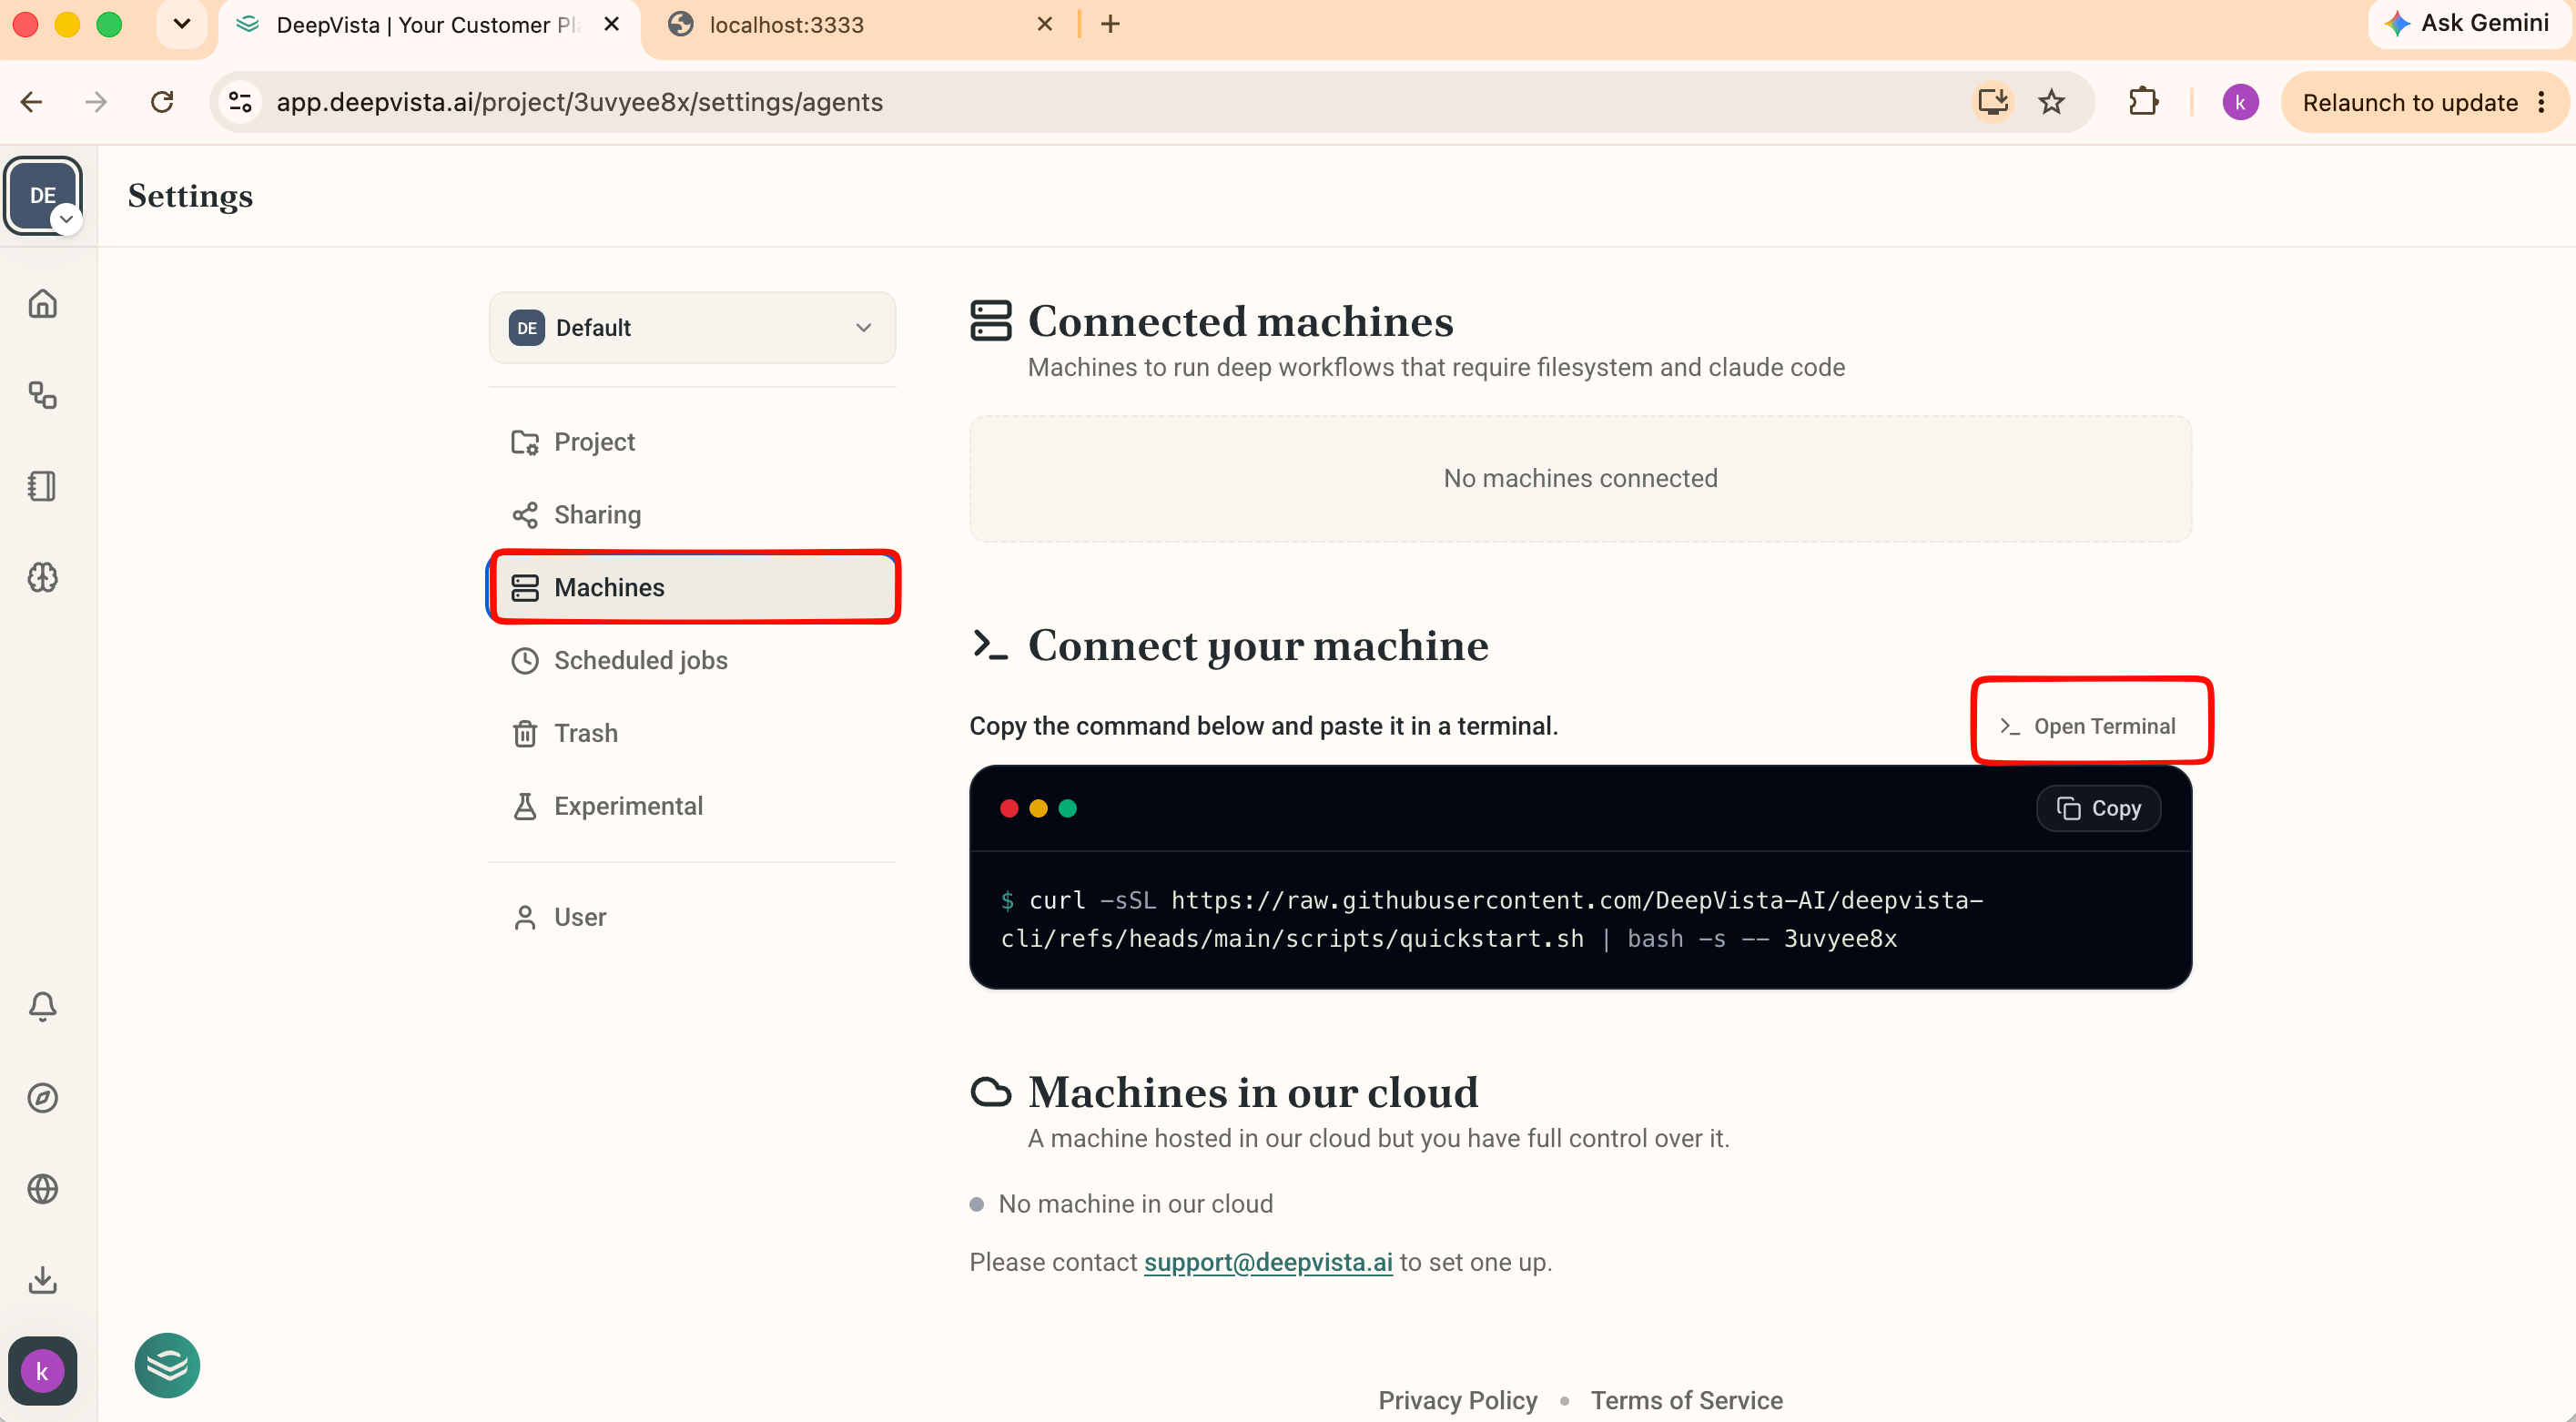
2
Copy, paste, and run
Copy the command shown, paste it into your terminal, and hit Return.
3
Let the setup checklist finish
The command installs the DeepVista CLI and Claude Code (skipping anything already installed), then starts listening for tasks.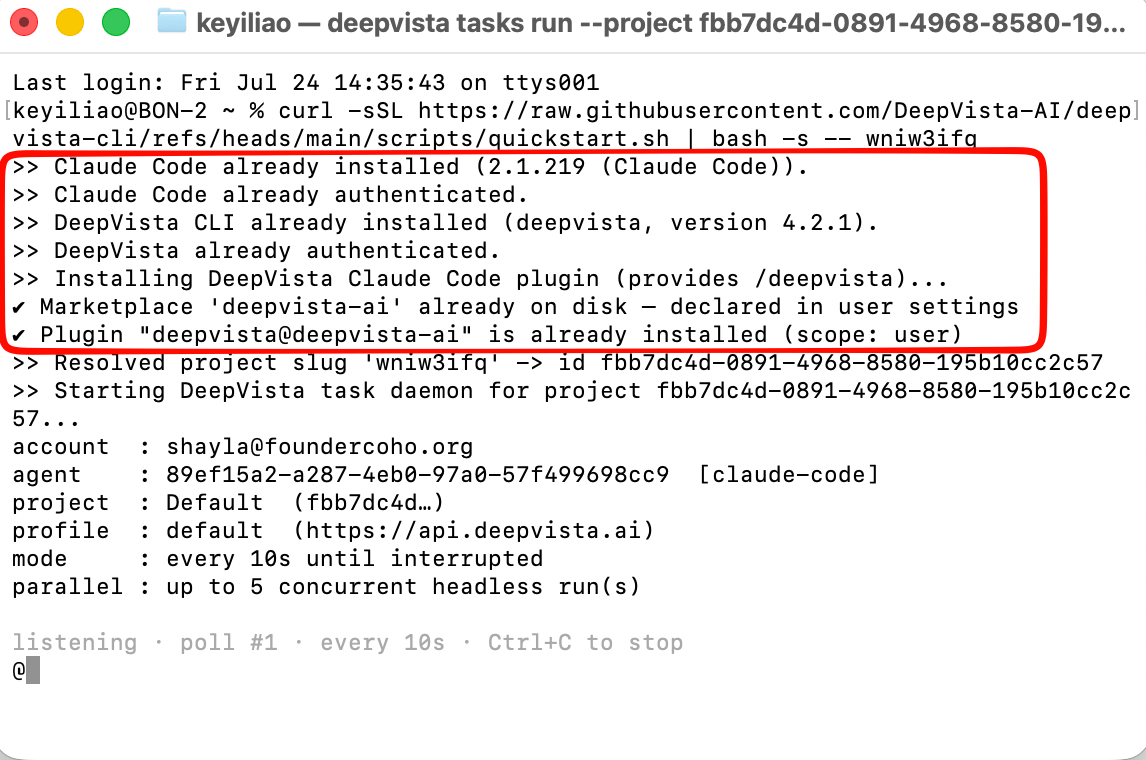
4
Confirm your machine is online
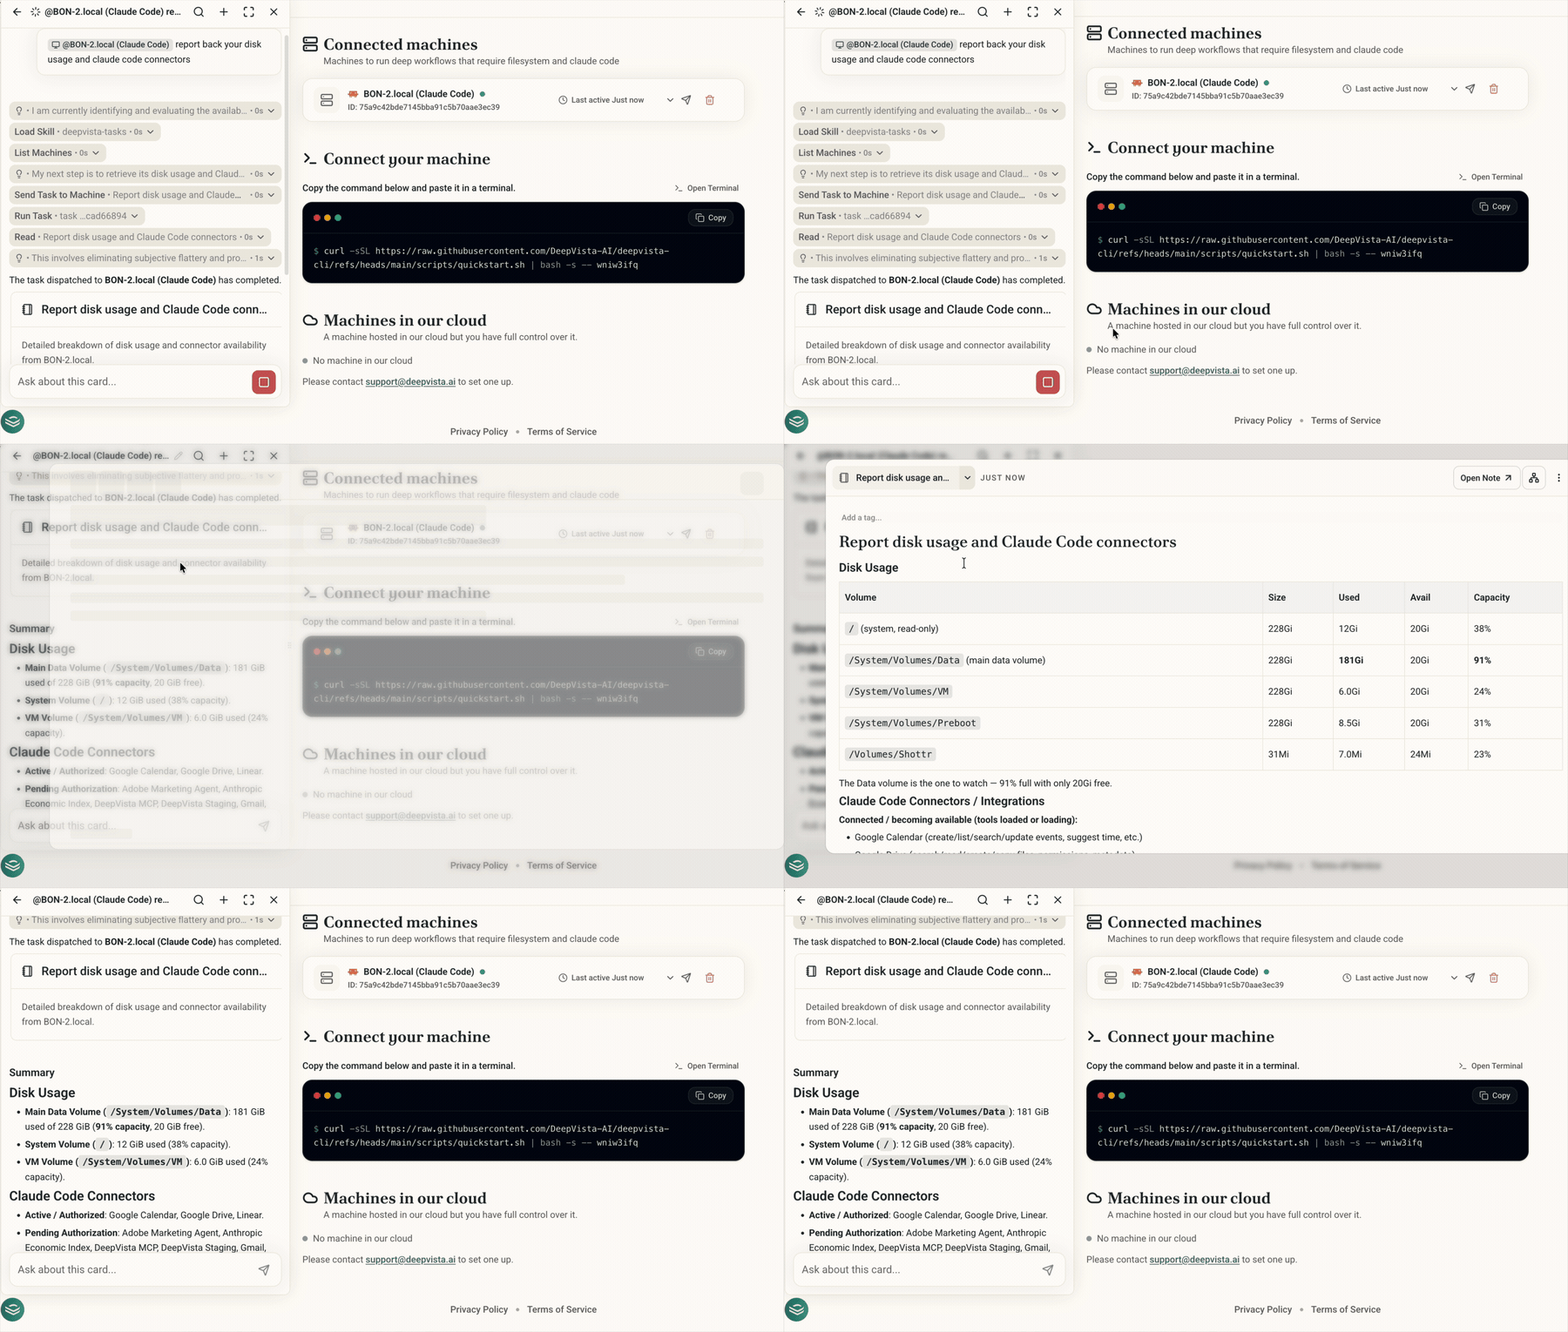
Back in DeepVista, your machine now appears under Connected machines with a green dot, ready to receive work.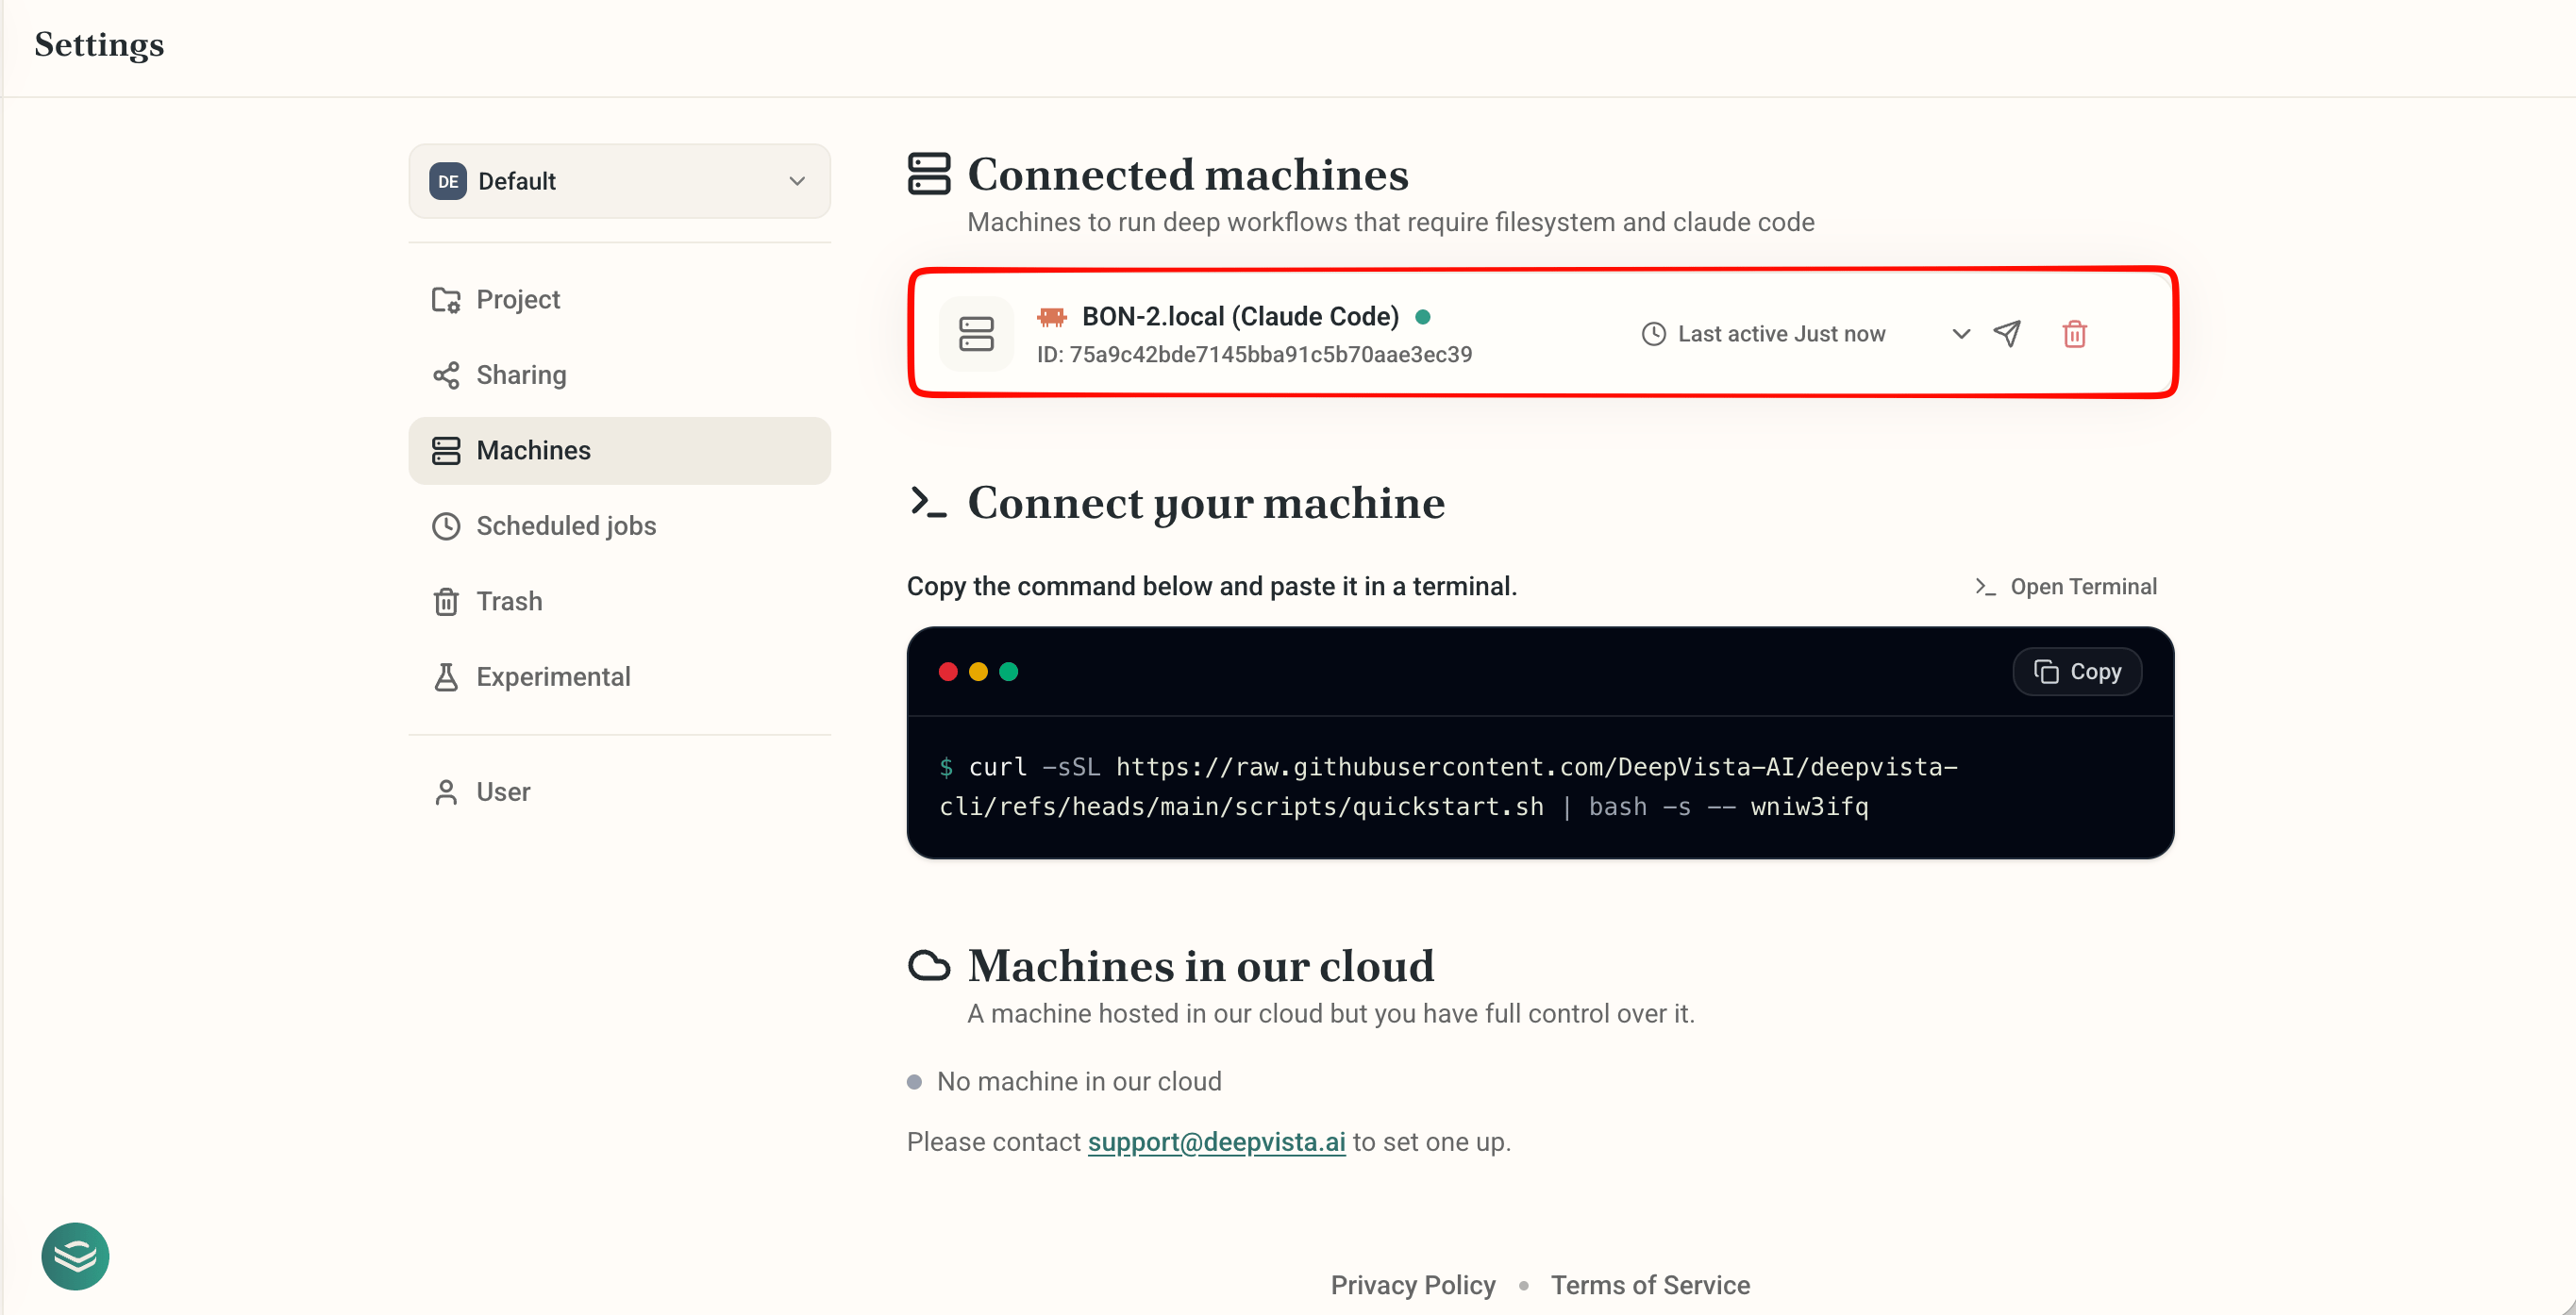
5
Run a test task
Click the send icon next to your machine to send a test task.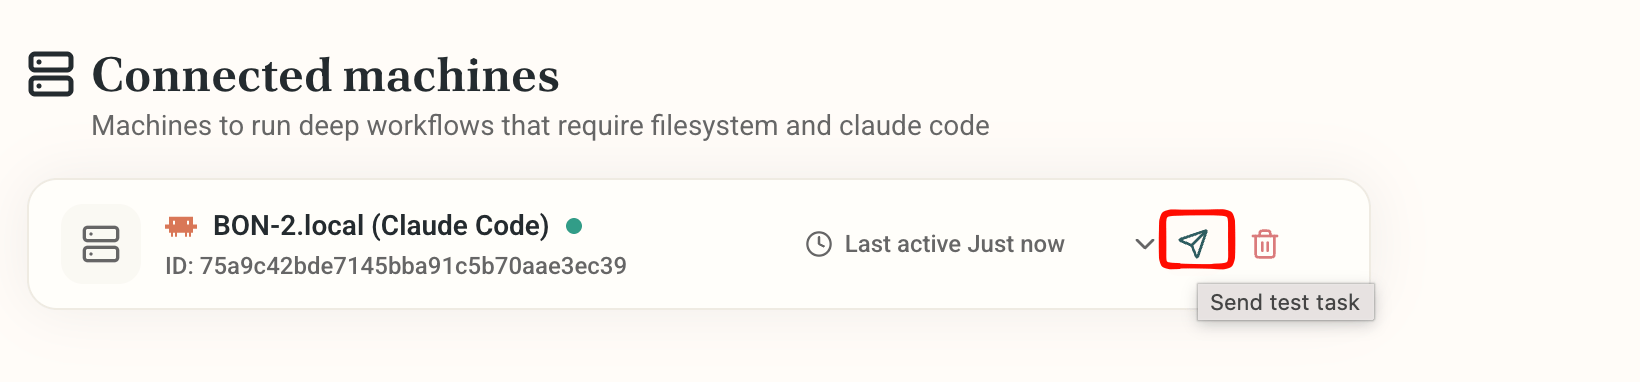
Next steps
Automating Linear Tickets via DeepVista Task Delegation
Let your connected machine create Linear tickets headlessly, from a cloud-triggered prompt.
Set Up an X Posting Workflow
Research, draft, and publish X posts with the Buffer CLI.