> ## Documentation Index
> Fetch the complete documentation index at: https://docs.deepvista.ai/llms.txt
> Use this file to discover all available pages before exploring further.
# Register Your Own Machine
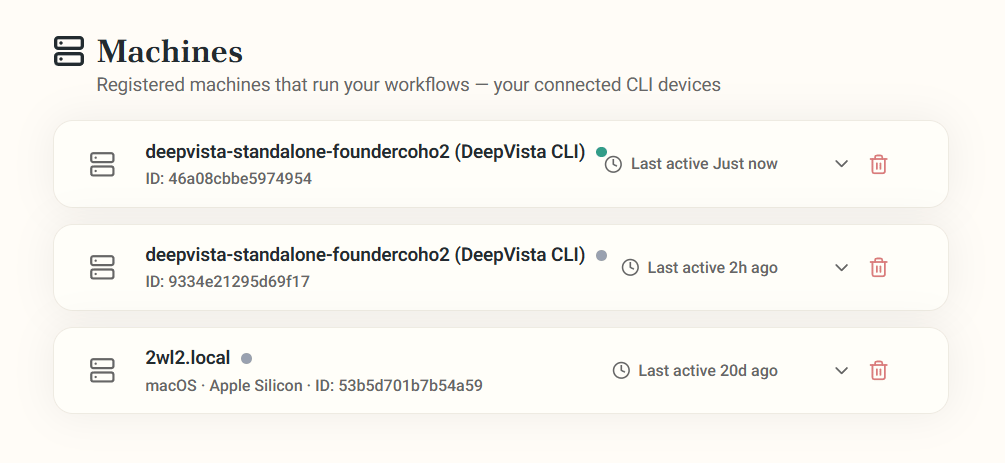
> Prefer utilizing your own hardware? Easily register your local desktop, laptop, or on-premise server as an active DeepVista runner using our CLI.
 ## Before You Begin
**Important Requirement:** Remote workflows will only execute as long as your registered machine is active, awake, and online. If your machine goes to sleep, shuts down, or loses its internet connection, the DeepVista runner will go offline and pending tasks will queue until it reconnects.
## Step-by-Step Registration Setup
### Step 1: Install the DeepVista CLI
Open your terminal and execute the following installation script to set up the CLI utility on your machine:
```bash theme={null}
curl -sSL [https://raw.githubusercontent.com/DeepVista-AI/deepvista-cli/main/install.sh](https://raw.githubusercontent.com/DeepVista-AI/deepvista-cli/main/install.sh) | bash
```
### Step 2: Register Your Device
Copy the registration command from Step 2 of your dashboard and paste it into your terminal. This command links your physical machine to your DeepVista project and initializes your local runner server:
```bash theme={null}
deepvista tasks run --project
```
### Authenticate Your Terminal
1. Open your terminal.
2. Run the following login command:
```bash theme={null}
claude login\
```
3. Select the login method: Claude account with subscription.
4. Your browser will automatically open to sign in (or you can copy the terminal-provided URL).
5. Once signed in, an authentication code will be provided in your browser window.
6. Copy and paste this code back into the terminal prompts.
## 3. Leverage Claude Connectors
Once authorized, your private server gains the superpower of running background workflows using any of the available Claude Connectors configured on your account.
**Integrations:** Google Drive, Microsoft 365, Notion
Read, write, and index files automatically.
**Integrations:** Gmail, Slack, MS Teams
Draft replies, summarize emails, and send automated reports.
**Integrations:** GitHub
Manage repositories, pull requests, and deploy code changes.
**Integrations:** Figma, Canva
Generate diagrams, grab design specs, and create layouts.
**Integrations:** Google Calendar
Coordinate meetings and manage schedules autonomously.
## Before You Begin
**Important Requirement:** Remote workflows will only execute as long as your registered machine is active, awake, and online. If your machine goes to sleep, shuts down, or loses its internet connection, the DeepVista runner will go offline and pending tasks will queue until it reconnects.
## Step-by-Step Registration Setup
### Step 1: Install the DeepVista CLI
Open your terminal and execute the following installation script to set up the CLI utility on your machine:
```bash theme={null}
curl -sSL [https://raw.githubusercontent.com/DeepVista-AI/deepvista-cli/main/install.sh](https://raw.githubusercontent.com/DeepVista-AI/deepvista-cli/main/install.sh) | bash
```
### Step 2: Register Your Device
Copy the registration command from Step 2 of your dashboard and paste it into your terminal. This command links your physical machine to your DeepVista project and initializes your local runner server:
```bash theme={null}
deepvista tasks run --project
```
### Authenticate Your Terminal
1. Open your terminal.
2. Run the following login command:
```bash theme={null}
claude login\
```
3. Select the login method: Claude account with subscription.
4. Your browser will automatically open to sign in (or you can copy the terminal-provided URL).
5. Once signed in, an authentication code will be provided in your browser window.
6. Copy and paste this code back into the terminal prompts.
## 3. Leverage Claude Connectors
Once authorized, your private server gains the superpower of running background workflows using any of the available Claude Connectors configured on your account.
**Integrations:** Google Drive, Microsoft 365, Notion
Read, write, and index files automatically.
**Integrations:** Gmail, Slack, MS Teams
Draft replies, summarize emails, and send automated reports.
**Integrations:** GitHub
Manage repositories, pull requests, and deploy code changes.
**Integrations:** Figma, Canva
Generate diagrams, grab design specs, and create layouts.
**Integrations:** Google Calendar
Coordinate meetings and manage schedules autonomously.